Cavity-Free Easter Egg activities every bunny will l❤️ve!
Fun & creative crafting ideas to celebrate Easter this year, cavity free!
Easter, the day that many children all around the globe, excitedly wait for the Easter bunny to arrive and deliver their treats of chocolate eggs. Hunting through the garden for the brightly coloured, delicious chocolate eggs that will inevitably be keeping the dentist busy for some time come.
The Egg is a prominent symbol of fertility and new life, painting and decorating eggs has been a common festive activity for many countries, including Germany, Ukraine, Poland, Russia, and Bulgaria. It is interesting to see how decorating of an egg has become a part of so many cultures all across the world.
There are many ways to use eggs to celebrate Easter that don’t involve chocolate smears from wall to wall, belly aches, hyperactivity in children, and of course those cheeky little requests for ‘chocolate as breakfast?, lunch? & dinner?’.
Cavity-Free Delicacies!!
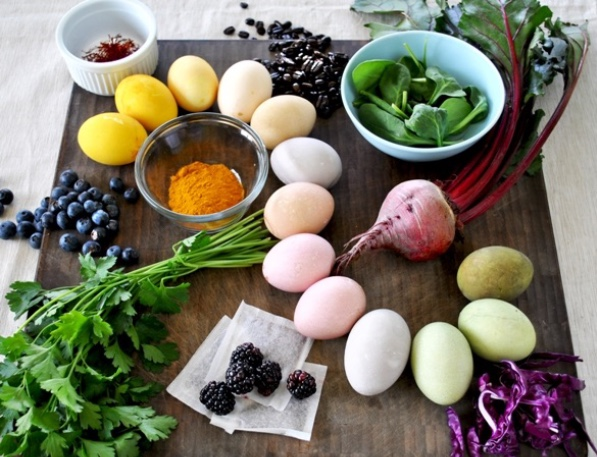
Painting and decorating Easter Eggs ~ Grab your kitchen scraps, glass jars, craft supplies and a healthy dose of imagination, Let’s get Eggs’llent this Easter! Thanks to Heather from Mommypotamus, “How To Dye Eggs Naturally With Everyday Ingredients” for the much appreciated inspiration.
How To make Dye Naturally
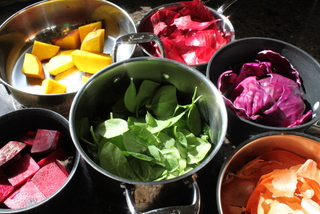
Making natural dye to decorate your Easter eggs is easier than you think, check out our list below.
- Pink
Two cups water + two cups peeled, grated beets & vinegar (1 tablespoon per cup of liquid that remains after you simmer the grated beets and water) - Orange
2 cups yellow onion peels & enough water to cover skins by 1 inch + vinegar (1 tablespoon per cup of liquid that remains after you simmer the onion peels and water) - Yellow
Two cups water & 1tablespoon turmeric & 2 tablespoons vinegar creates this vibrant yellow on white eggs and a deep gold on brown ones.
Other options: Strongly brewed chamomile tea creates a soft yellow. - Green / Blue
2 cups shredded purple cabbage + enough water to cover cabbage by 1 inch + vinegar (1 tablespoon per remaining cup after the dye is boiled) Brown eggs will turn green and white eggs will turn blue. - Purple
1-2 cups beet kvass, prepared at least a week in advance.
Other options: Strongly brewed hibiscus tea (with one tablespoon vinegar per cup) will create the dark green. Blueberries will create a slightly marbled blue colour.
INGREDIENTS/TOOLS NEEDED:
- Natural dye materials (shredded beets, turmeric, etc)
- Filtered water
- 1 tablespoon vinegar – each dye colour
- pots for simmering ingredients and boiling eggs
- mesh strainer
- small bowls or mason jars
- eggs
- coconut oil (optional – for adding gloss to eggs)
DIRECTIONS FOR MAKING NATURAL DYE:
1. Bring dye matter and water to a boil. Turn heat down to low and simmer, covered, for 15-60 minutes until desired colour is reached.
Keep in mind that the eggs will be several
shades lighter so it’s best to go for deep, rich hues.
2. Remove liquid from heat and let cool to room temperature.
3. Pour dye through a mesh strainer into bowls/mason jars and add 1 tablespoon of vinegar for each cup of dye liquid.
4. Add hardboiled eggs to dye and place in fridge until desired colour is reached.
DIRECTIONS FOR EGGS:
1. Add eggs to a medium pot and cover with cold
water. Bring pot to a boil. Once it’s rolling turn
off the heat and cover the pot. Sit for 10 minutes, place eggs in a bowl of cold water and let sit until they’re cool to the touch.
2. Drain bowl and replace with warm, soapy water Gently rub eggs with a washcloth or your thumb to remove oils that prohibit natural dyes from adhering as effectively to the egg shell.
3. Lower egg into the dye and place them in the fridge. Soak until your desired colour is reached.
4. When the eggs are ready scoop them out with a spoon and place on a drying rack or an upside down egg carton.
5. Naturally-dyed eggs have a matte finish. If you’d like to add a little gloss, rub with a drop or two of coconut oil.
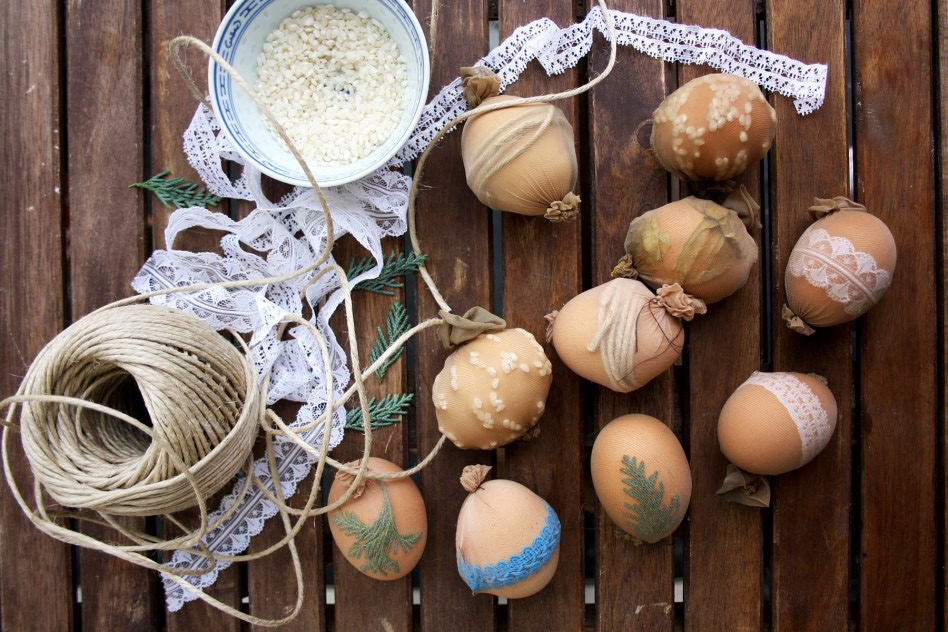
To add some texture, patterns and other designs, simply grab an old stocking/pantyhose, some twine and a variety of shaped leaves, lace cut offs and rice.
Wrap around the egg as shown in the picture above, before laying your eggs to rest in your favourite colour, to have the design imprinted onto the egg.
We hope you have a Eggs’llent Easter!